A guided tour
Ten minutes with the real application — what every part of the window is, and what happens when you type the first command.
Every screenshot on this page is of the running application, captured by driving it the way the text describes.
The window#
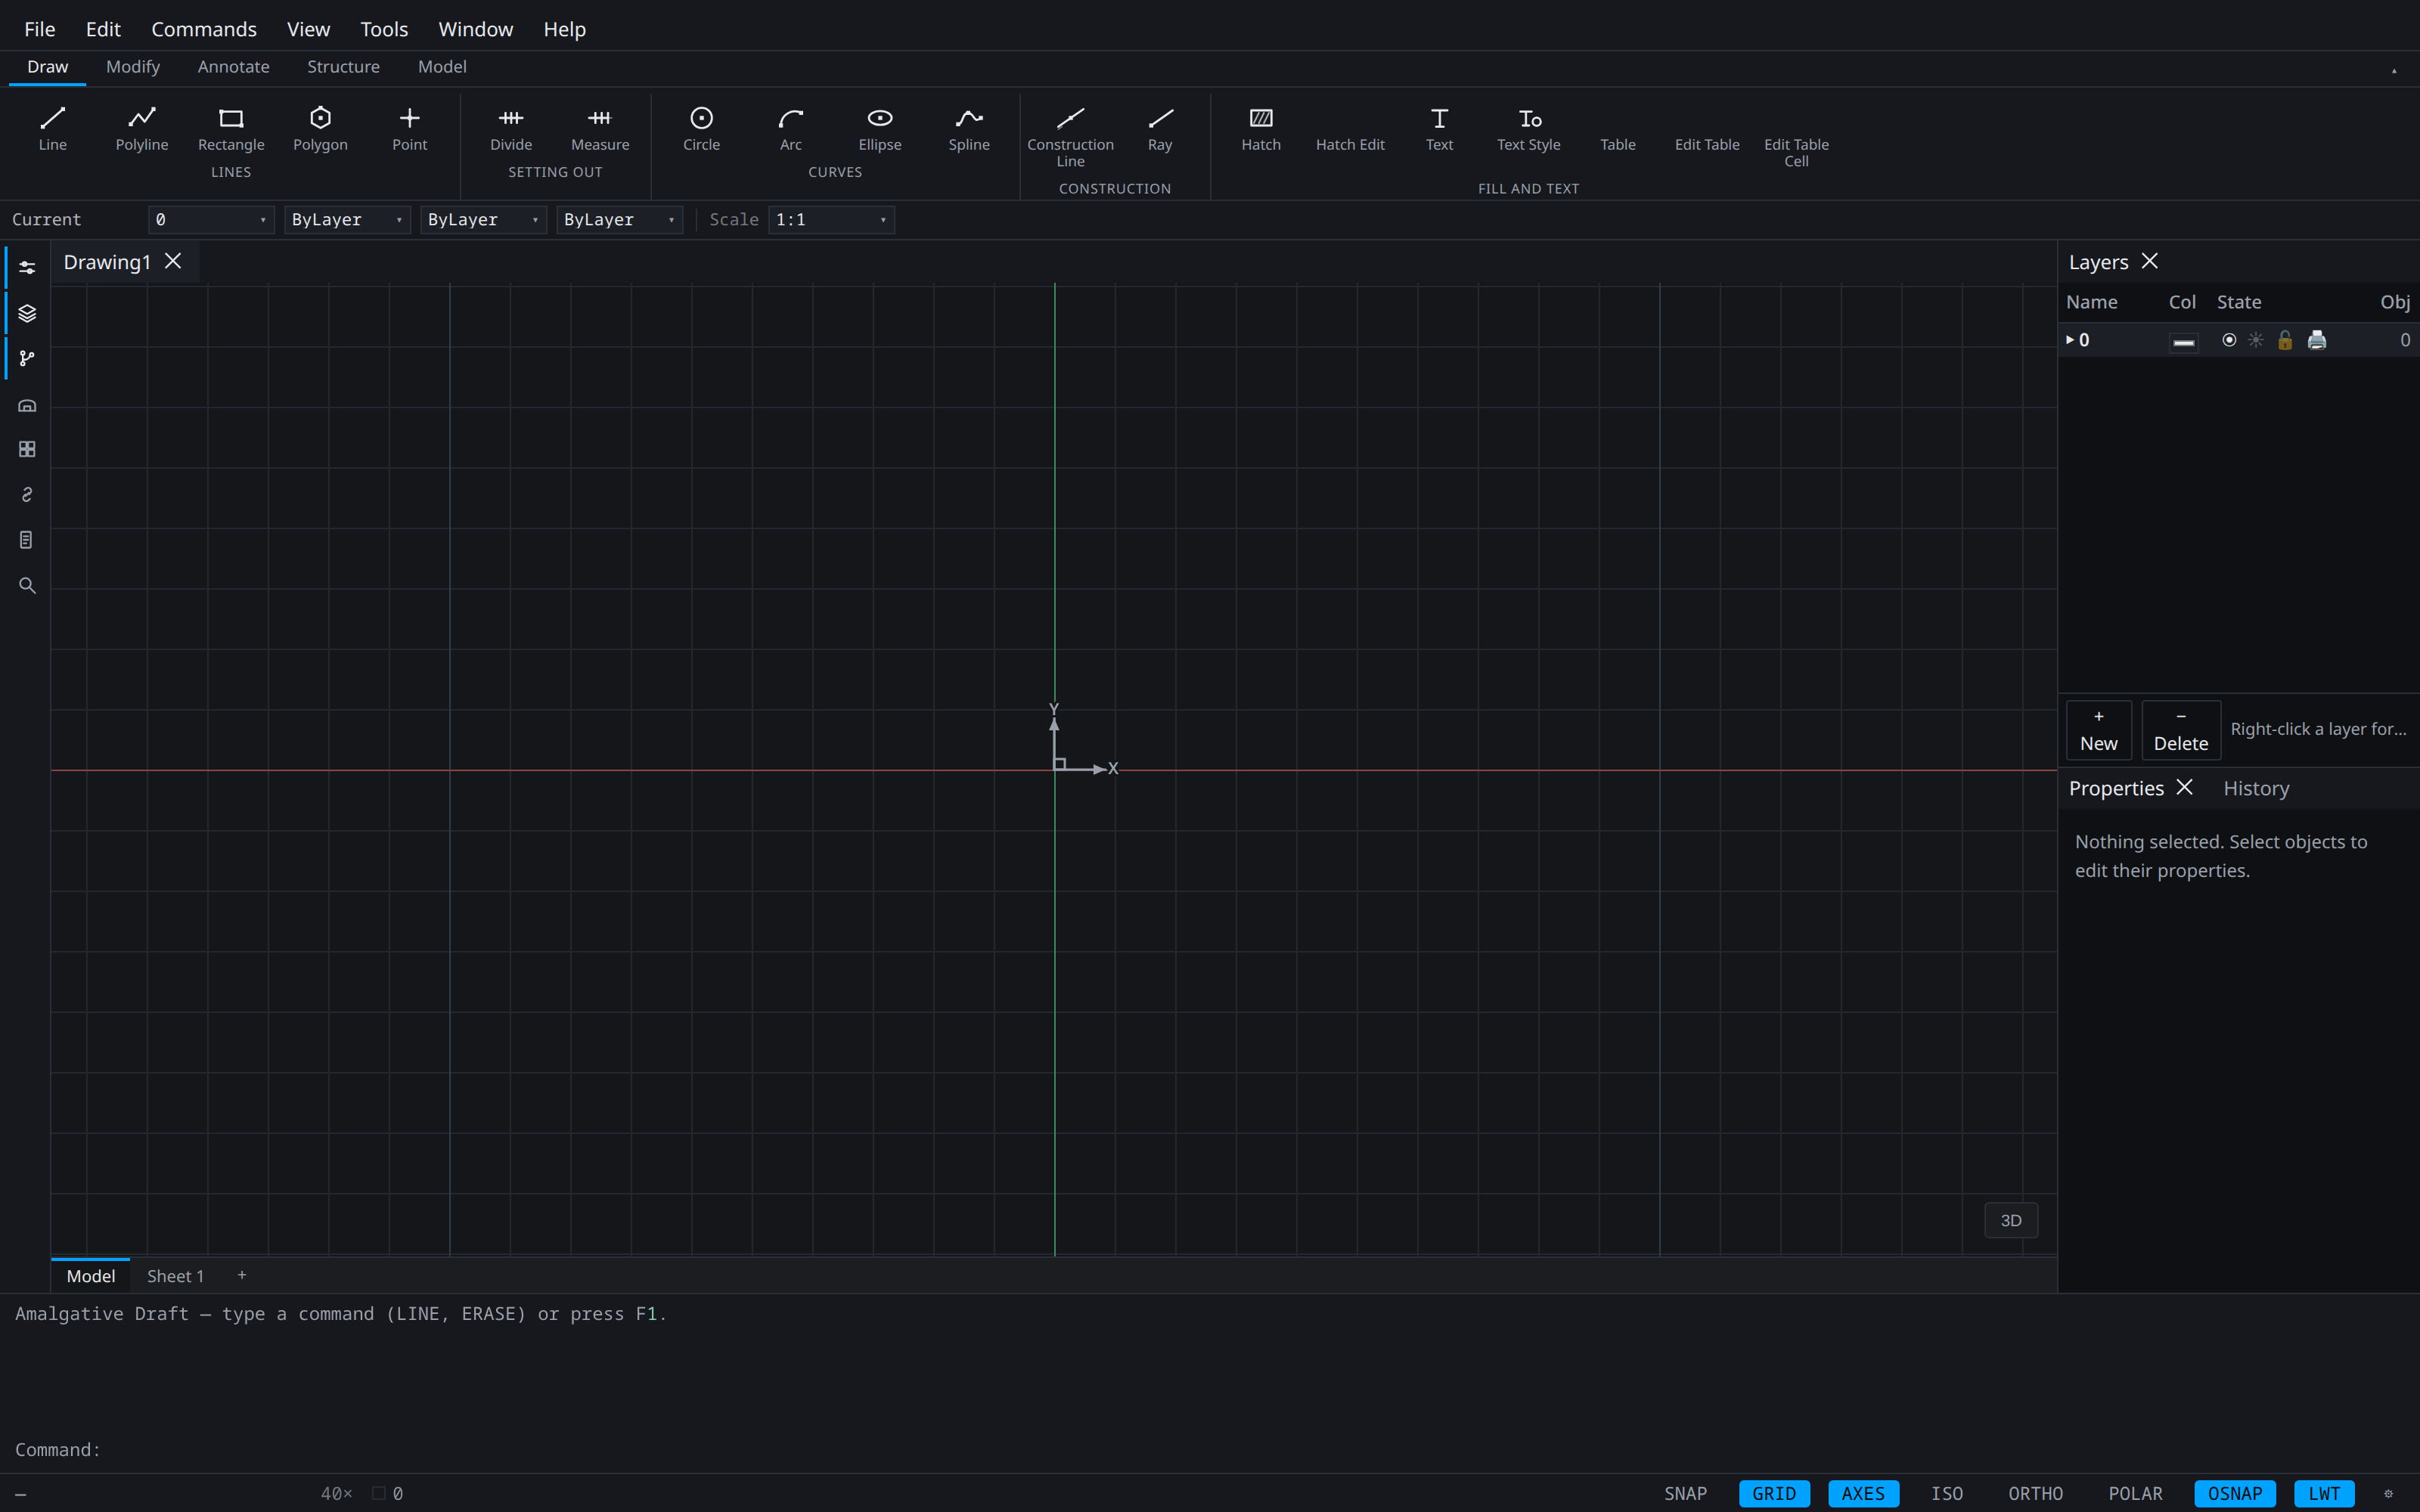
- Menu bar — the complete surface. Everything the application can do is in here, and each item shows the command's typed alias beside it, so the menu teaches you how to stop using the menu.
- Ribbon — what you reach for often, in tabs: Draw, Modify, Annotate, Structure, Model. Generated from the command registry, so it can never offer a command that does not exist.
- Properties bar — the current layer, colour, linetype, lineweight and annotation scale. These are what new geometry will be created with.
- Panel rail — the panel inventory down the left edge. Click one to open it or bring it forward; click the one in front to close it. A panel that is not built yet is listed and disabled, with a tooltip saying so.
- Drawing canvas — infinite model space. The grid measures, the red and green lines are the X and Y axes, and the marker at the origin is the UCS icon.
- Panels — here Layers, Properties and History. Every palette is a dockable panel: drag it to any edge, tab it with its neighbours, float it, or close it.
- Sheet tabs — Model first, then every layout sheet, with a
+to add one. This is how you get from the drawing to the paper it plots on. - Command line — the primary input surface, with its scrollback above and the prompt at the bottom.
- Status bar — the live cursor coordinate, the zoom, and the drafting toggles. A toggle that is lit is on; each is also an F-key and a typed command.
Typing your first command#
Draft has no bare-letter hotkeys, and that is deliberate. Every printable keystroke on the canvas goes into the command line, where it is matched against command names and aliases. L starts LINE because l is LINE's alias — not because a key handler fires.
That one rule is what lets L, LINE, 10,5, @10<45 and a keyword letter all arrive through the same input path.

Read a prompt as: what it wants, then or [Alternatives]. Typing D at a circle's radius prompt switches it to diameter. A value in angle brackets is the default, and Enter accepts it.
Drawing something#
Type LINE, press Enter, and click a start point. Now move the cursor.
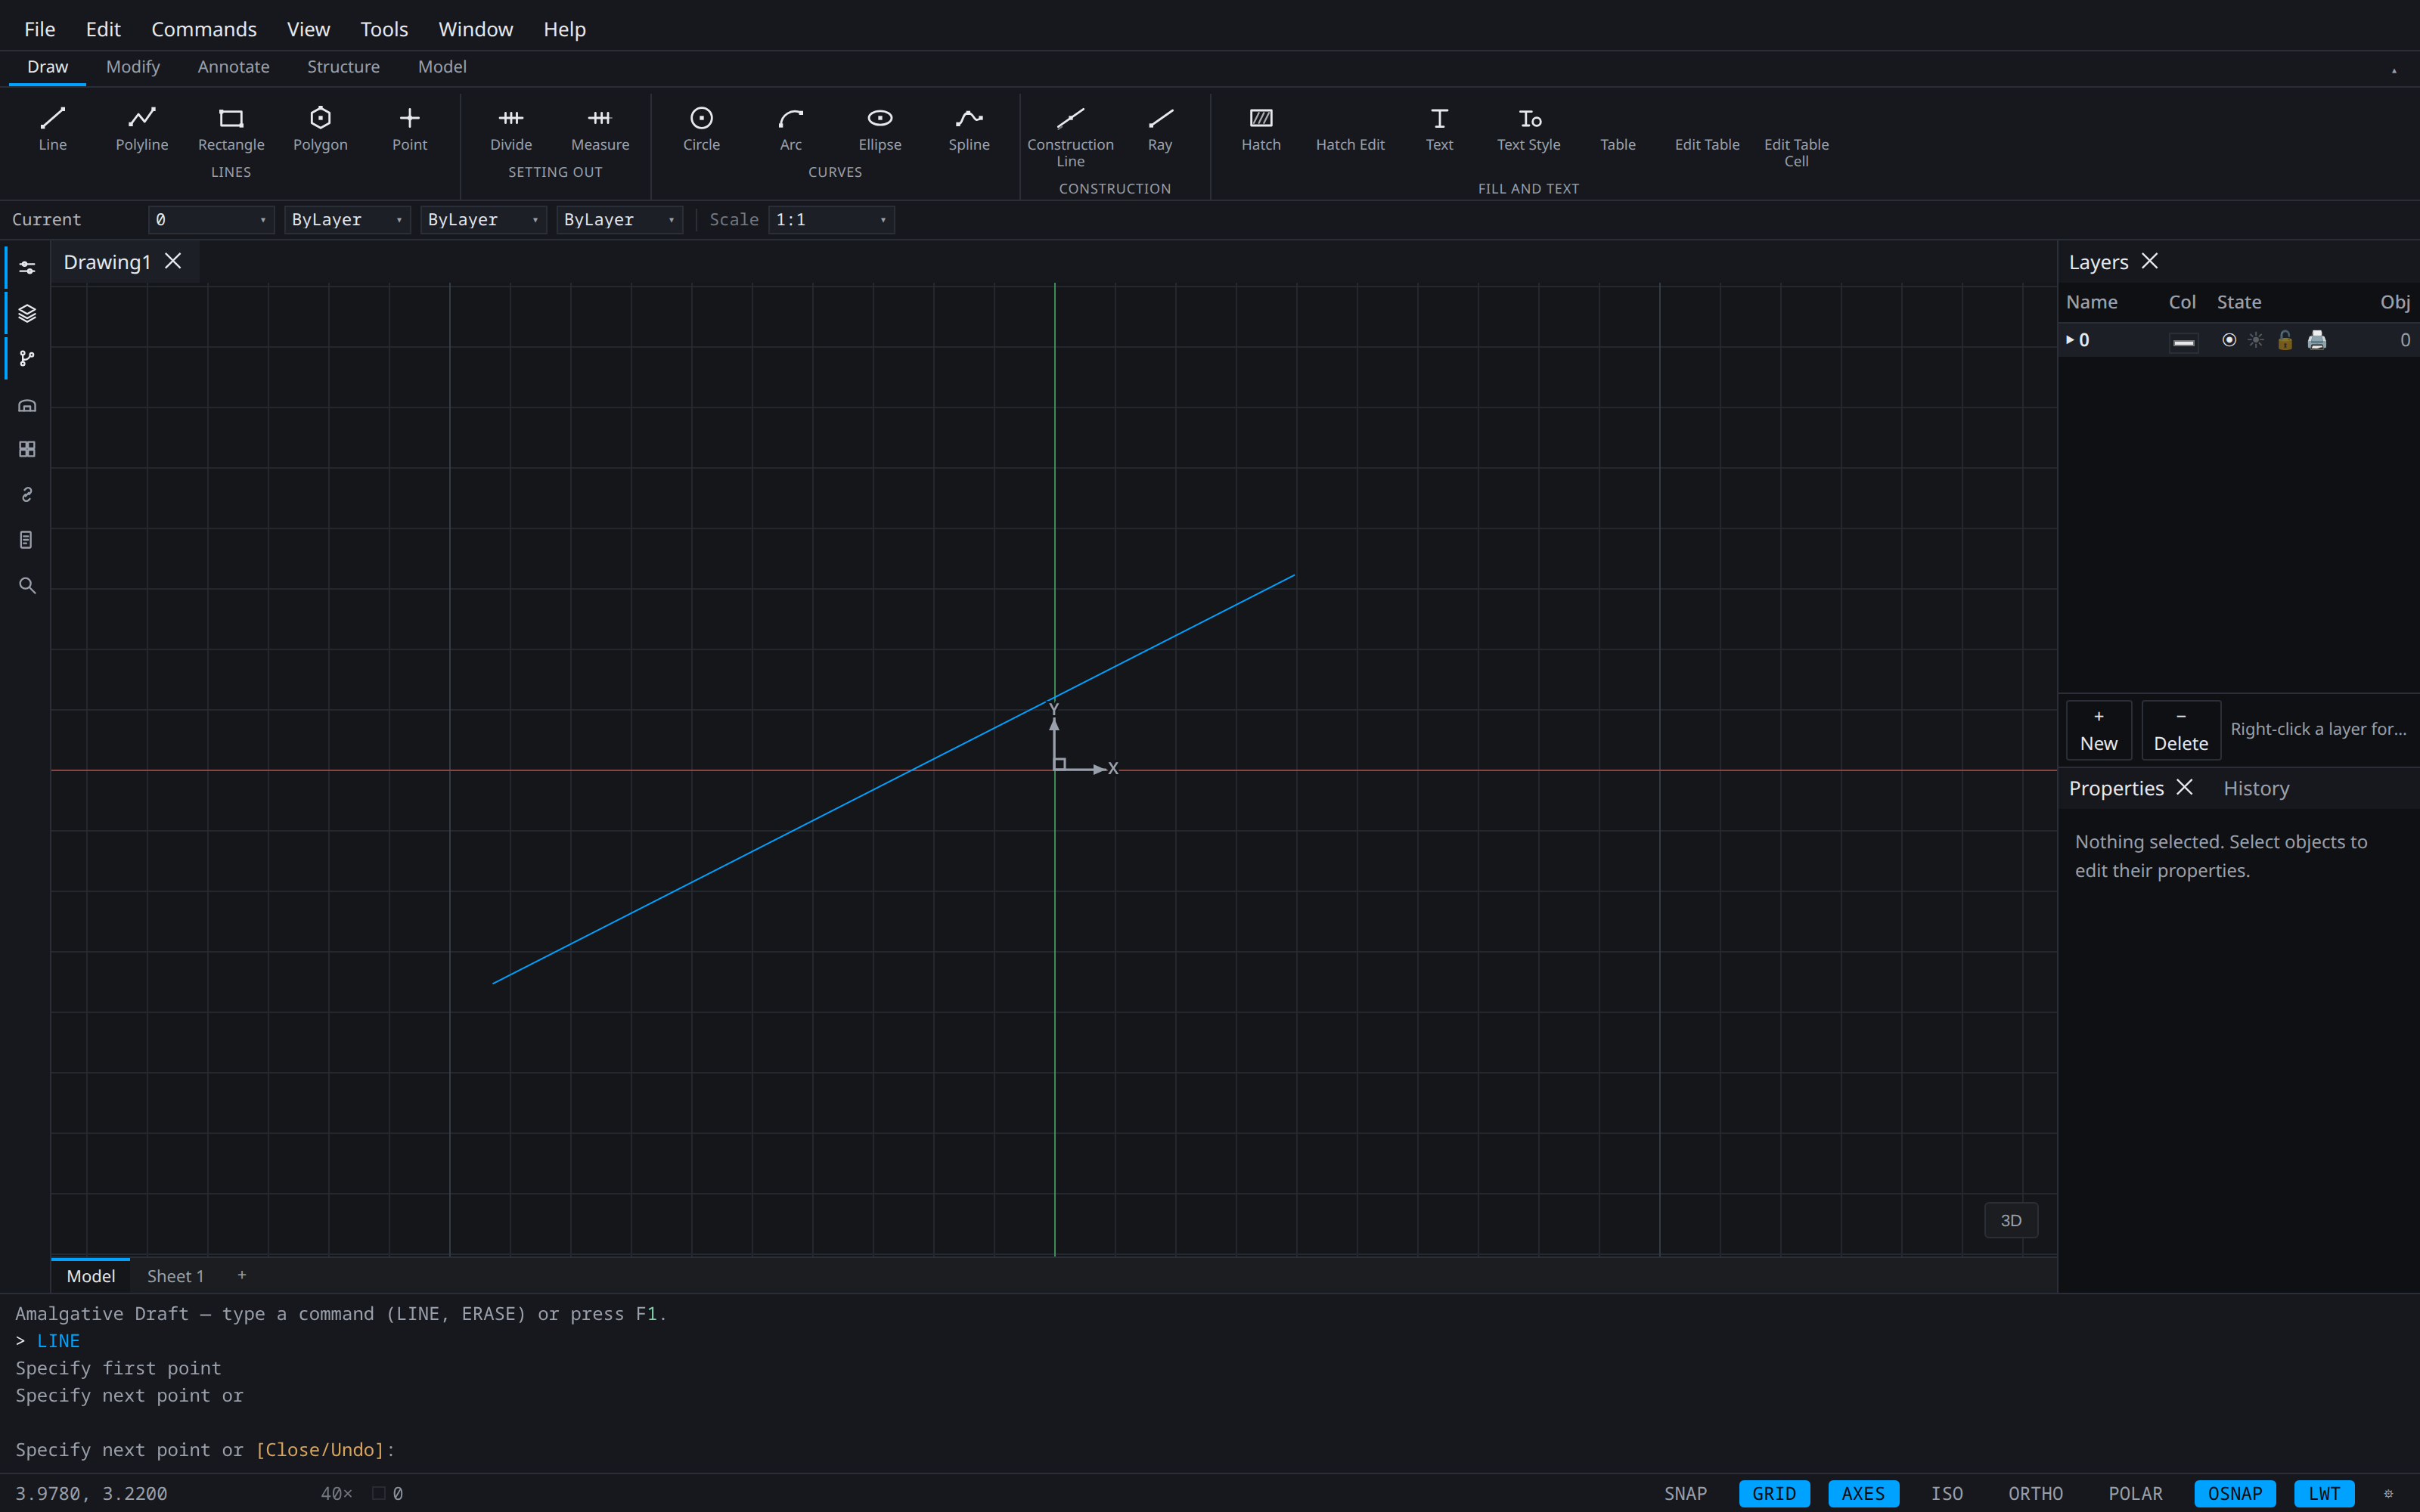
The preview follows the cursor through the whole constraint pipeline — grid snap, then ortho or polar, then object snap — so what you see previewed is exactly what gets committed. Object snap has the final say; if a snap fires, the command receives the snapped coordinate rather than the raw cursor position.
Keep clicking and LINE keeps going, committing an independent segment each time.
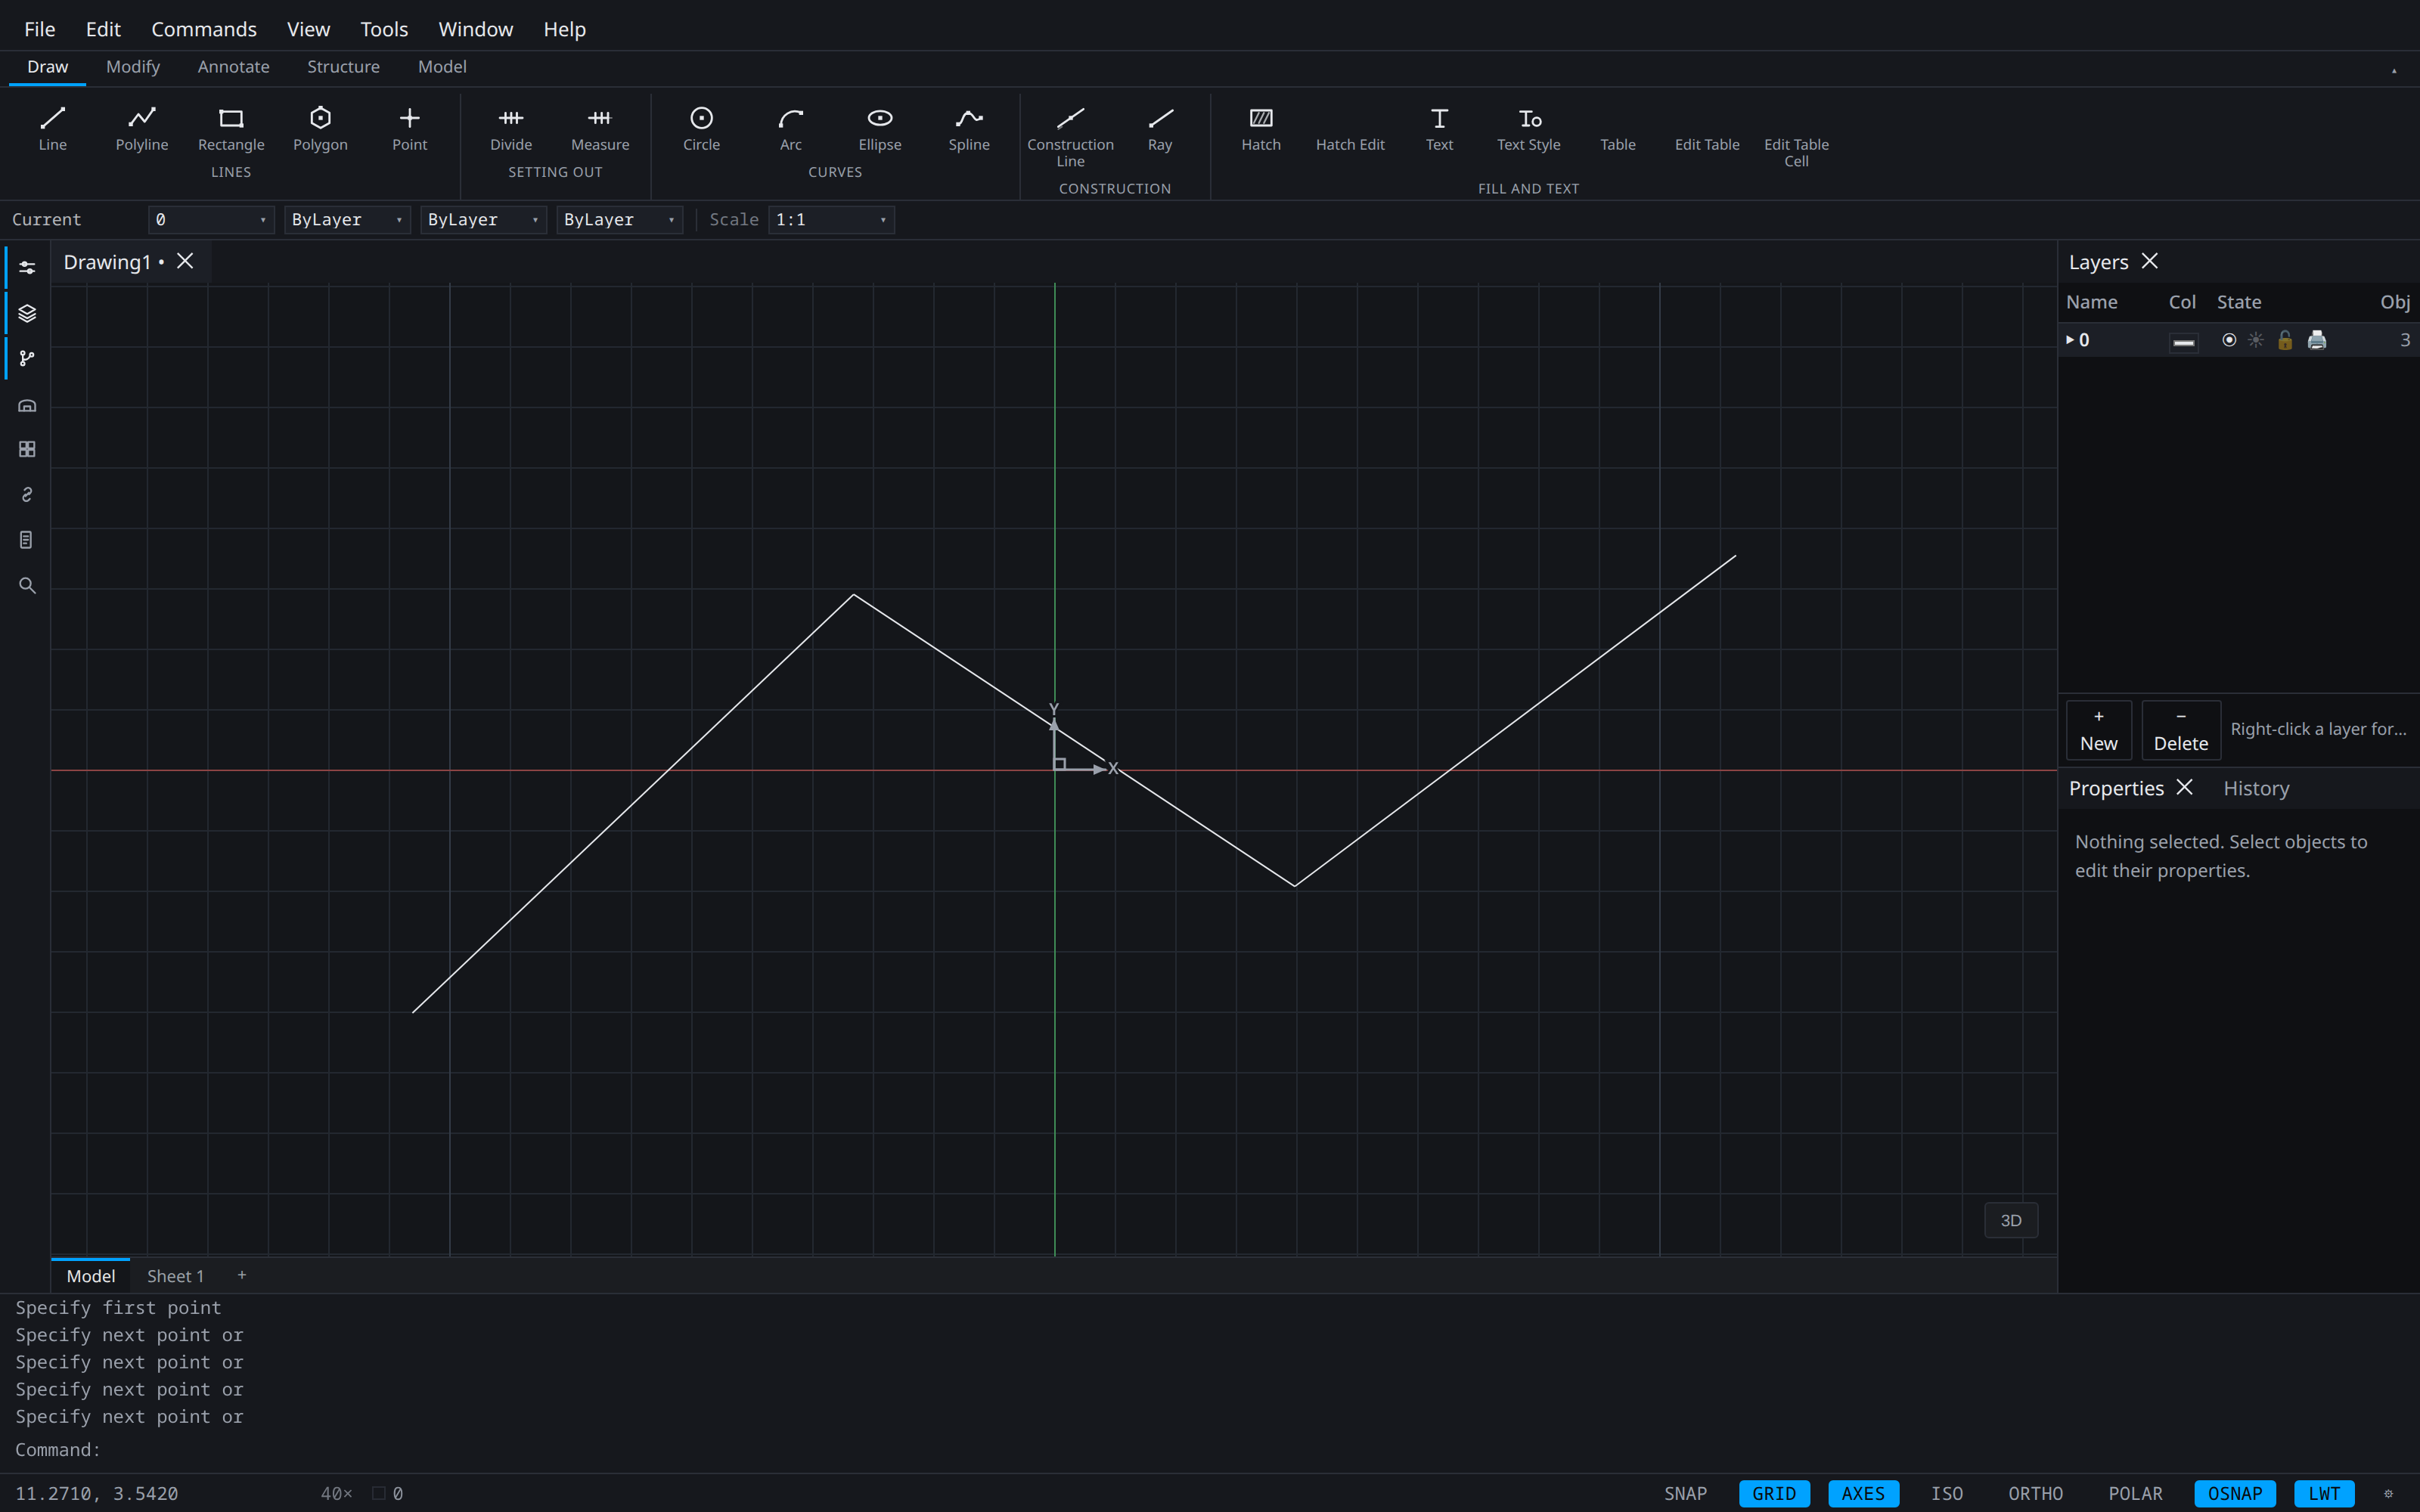
Three things worth noticing in that last frame:
- The layer row now reads 4. LINE creates independent segments, not a polyline. If you want one entity, that is
PLINE. - The command scrollback records every prompt, so you can see what you were asked and what you answered.
- Nothing was selected afterwards. Draft accepts both orders — select then command, or command then select — so it does not force a selection on you.
The five things to try next#
- Snap to what you drew. Press
F3to be sure object snap is on, start anotherLINE, and move near an existing endpoint. The cursor magnetizes, a square marker appears, and a tooltip names the snap type. - Constrain a direction. Press
F8for ortho, then draw. Type a bare number like24and you get 24 units along the locked direction. - Type a coordinate instead of picking.
@10<45is 10 units at 45° from the last point. Picking and typing are interchangeable at every point prompt. - Modify something. Select a line and type
Ofor OFFSET, orTRfor TRIM. Every visible entity is an implicit cutting edge — there is no separate boundary-selection step. - Go to paper. Click
+in the sheet tabs, thenMVIEWto cut a viewport into the model. That is the whole model-to-sheet path.
Where to go from here#
- Keyboard shortcuts — the function keys, modifier chords and mouse gestures on one page.
- Precision drafting — the constraint pipeline and object snaps in full. This is the page that makes Draft feel like the tool you already know.
- Command reference — every alias, and what each command asks for.
- The interface — the reference version of this page: every surface, and why there is more than one.