A guided tour
Ten minutes with the real application — the workspace, drawing your first markup, and getting a calibrated quantity out of a drawing.
Every screenshot on this page is of the running application, captured by driving it the way the text describes.
The window#
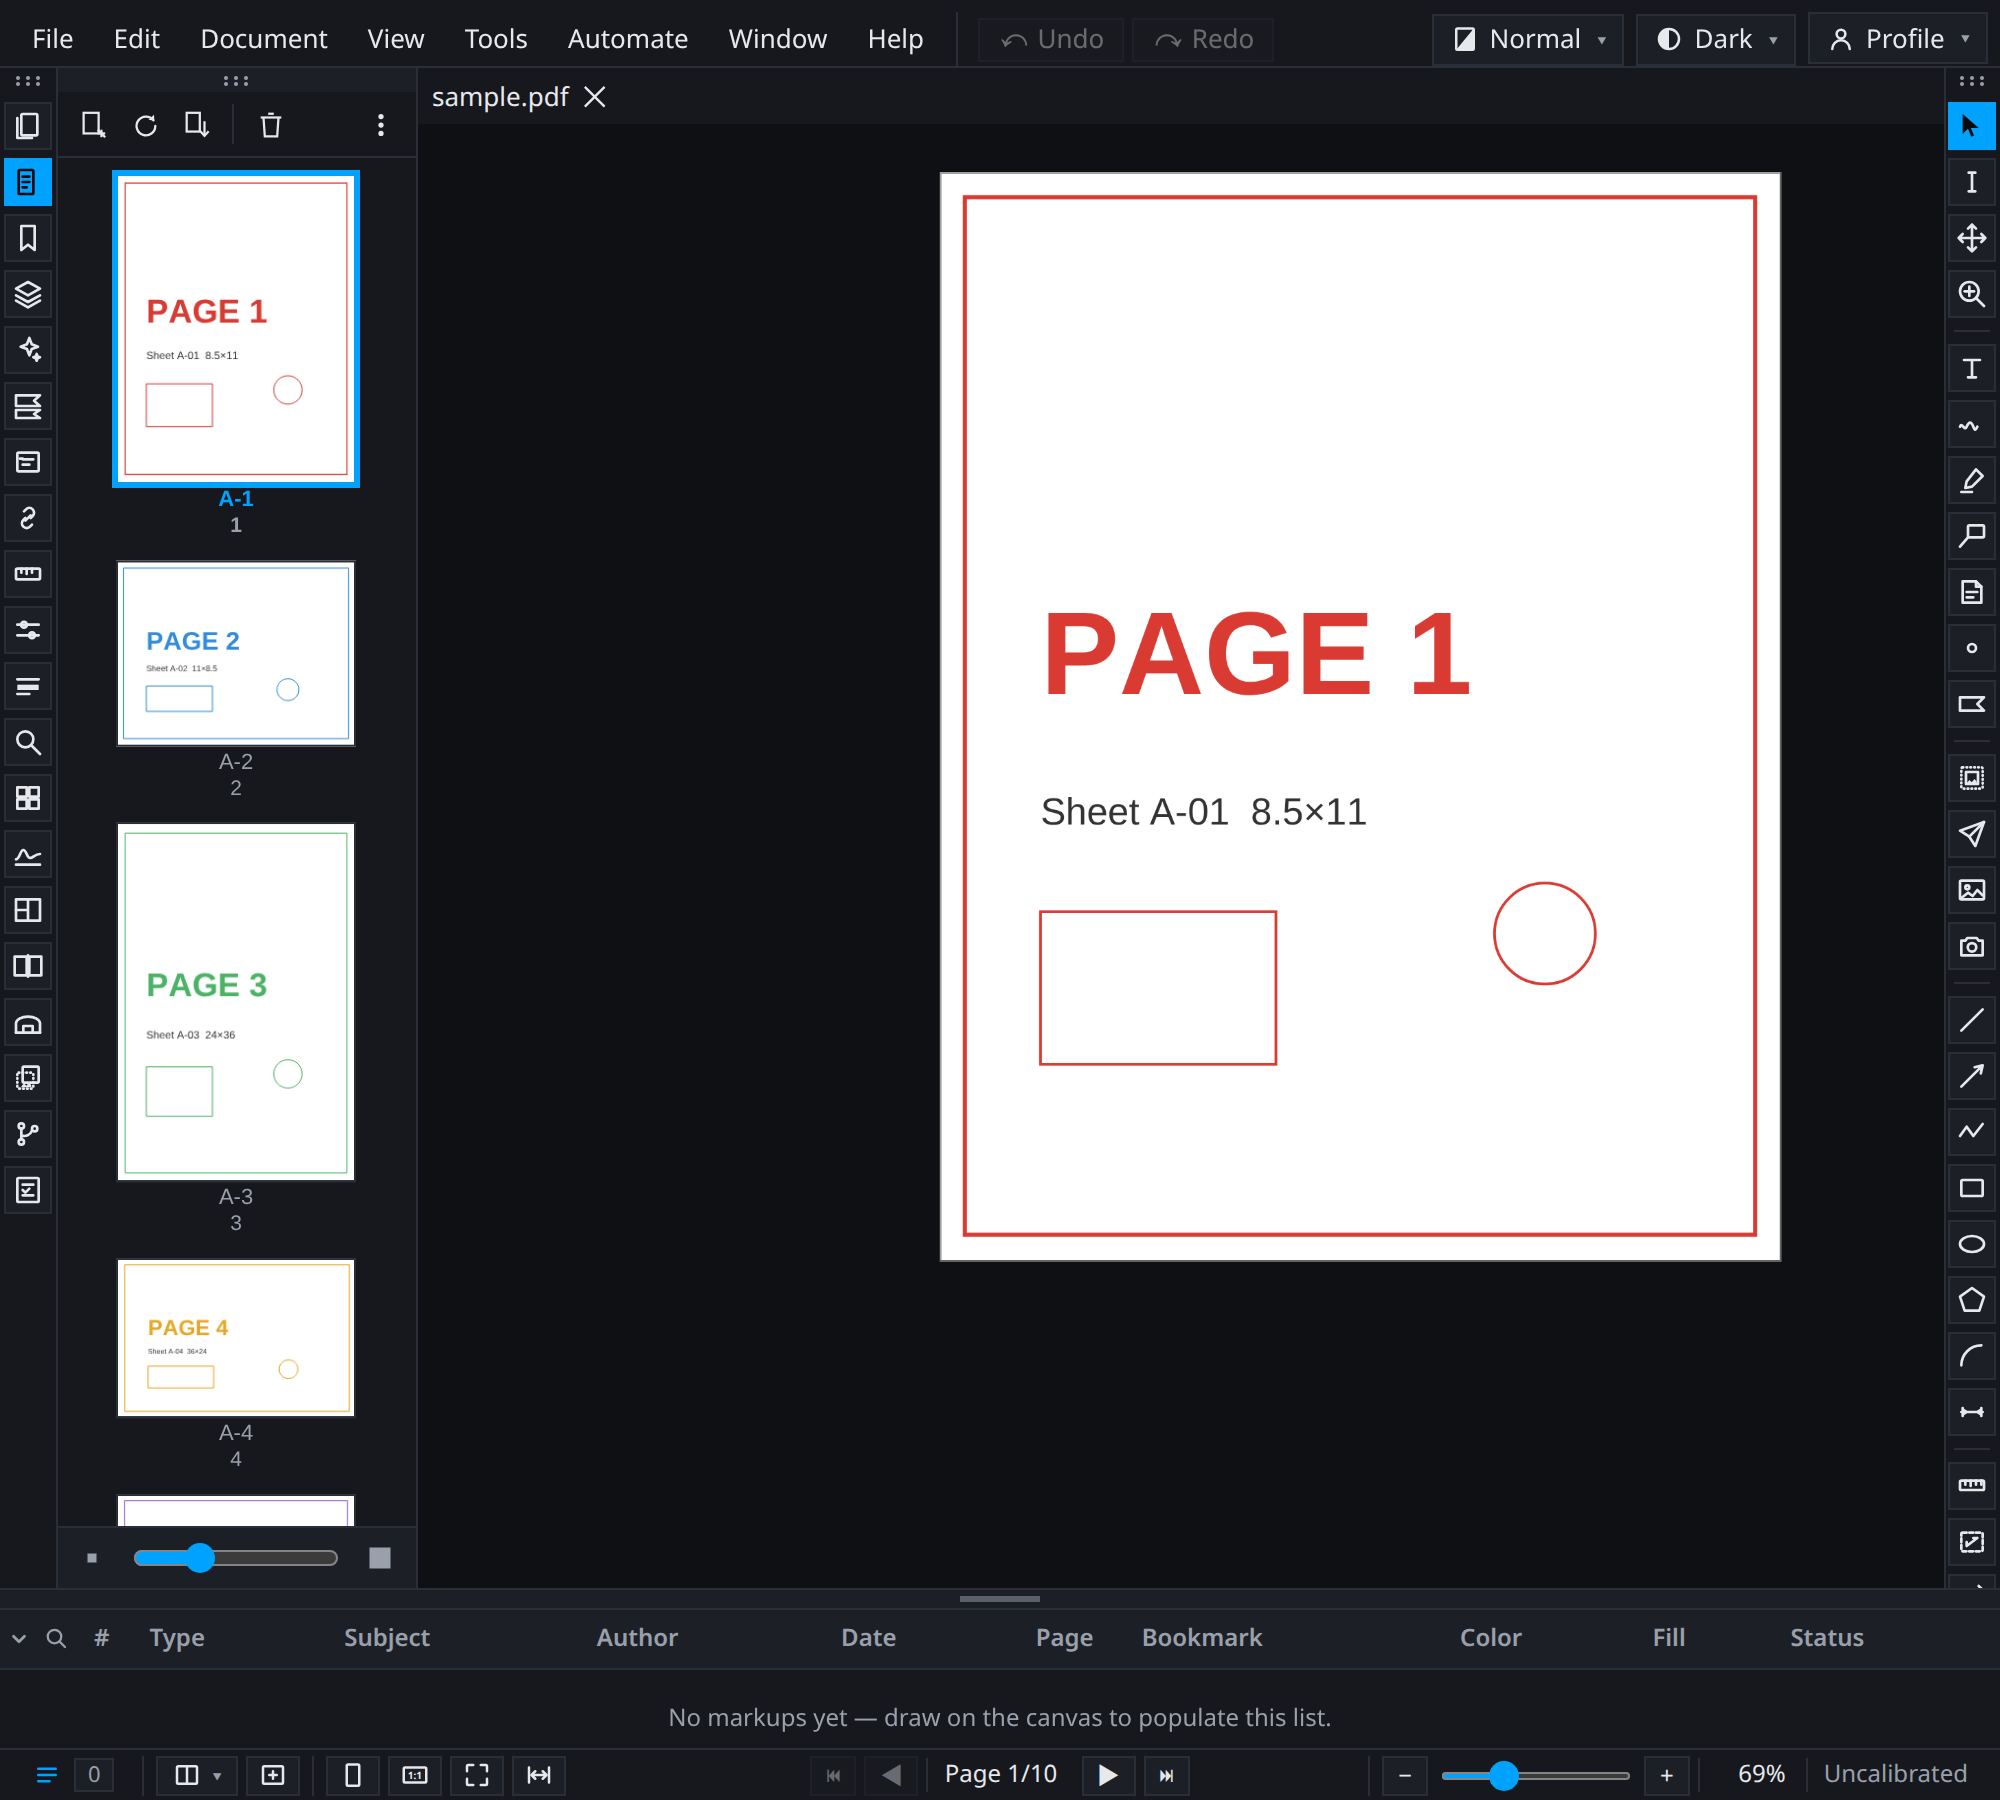
- Menu bar — File, Edit, Document, View, Tools, Automate, Window. Automate is where the batch operations live.
- Undo and redo — every change in the application goes through one command bus, so these cover all of it uniformly.
- Workspace controls, top right — the layout preset, the theme, and the profile. A profile is a saved arrangement: a takeoff estimator and a reviewer want different windows.
- Quick properties bar — the armed tool and its style: line colour, width, dash pattern, opacity, fill. Change it here and the next markup you draw uses it.
- Panel rail, down the left edge — Pages, Bookmarks, Layers, Folder, Properties, Measurements, History, Takeoff Hanger, Stamps. Click one to open it; click the one already in front to close it.
- The open panel — here Pages, showing every sheet as a thumbnail with its label. This is where you reorder, rotate, insert, extract and delete pages. Every panel docks, tabs, floats and closes.
- Document tab — Redline is multi-document; several PDFs can be open at once, and two panes can show the same one.
- The sheet — the page raster, with the markup and interaction layers stacked over it.
- Tool rail, down the right edge — select, text, pan, zoom, and the draw and measure tools.
- Markups List, along the foot — every markup as a row. Drag its top edge to give it more or less room; for takeoff work this is the primary surface, not a secondary one.
- Status bar — page navigation, zoom, and the scale. It reads Uncalibrated until the page has one, which is the first thing to fix on a drawing you intend to measure.
Drawing a markup#
Press R for the rectangle tool and drag one out. Bare letters arm draw tools, Shift+letter arms measurement tools, and Esc always returns you to Select.
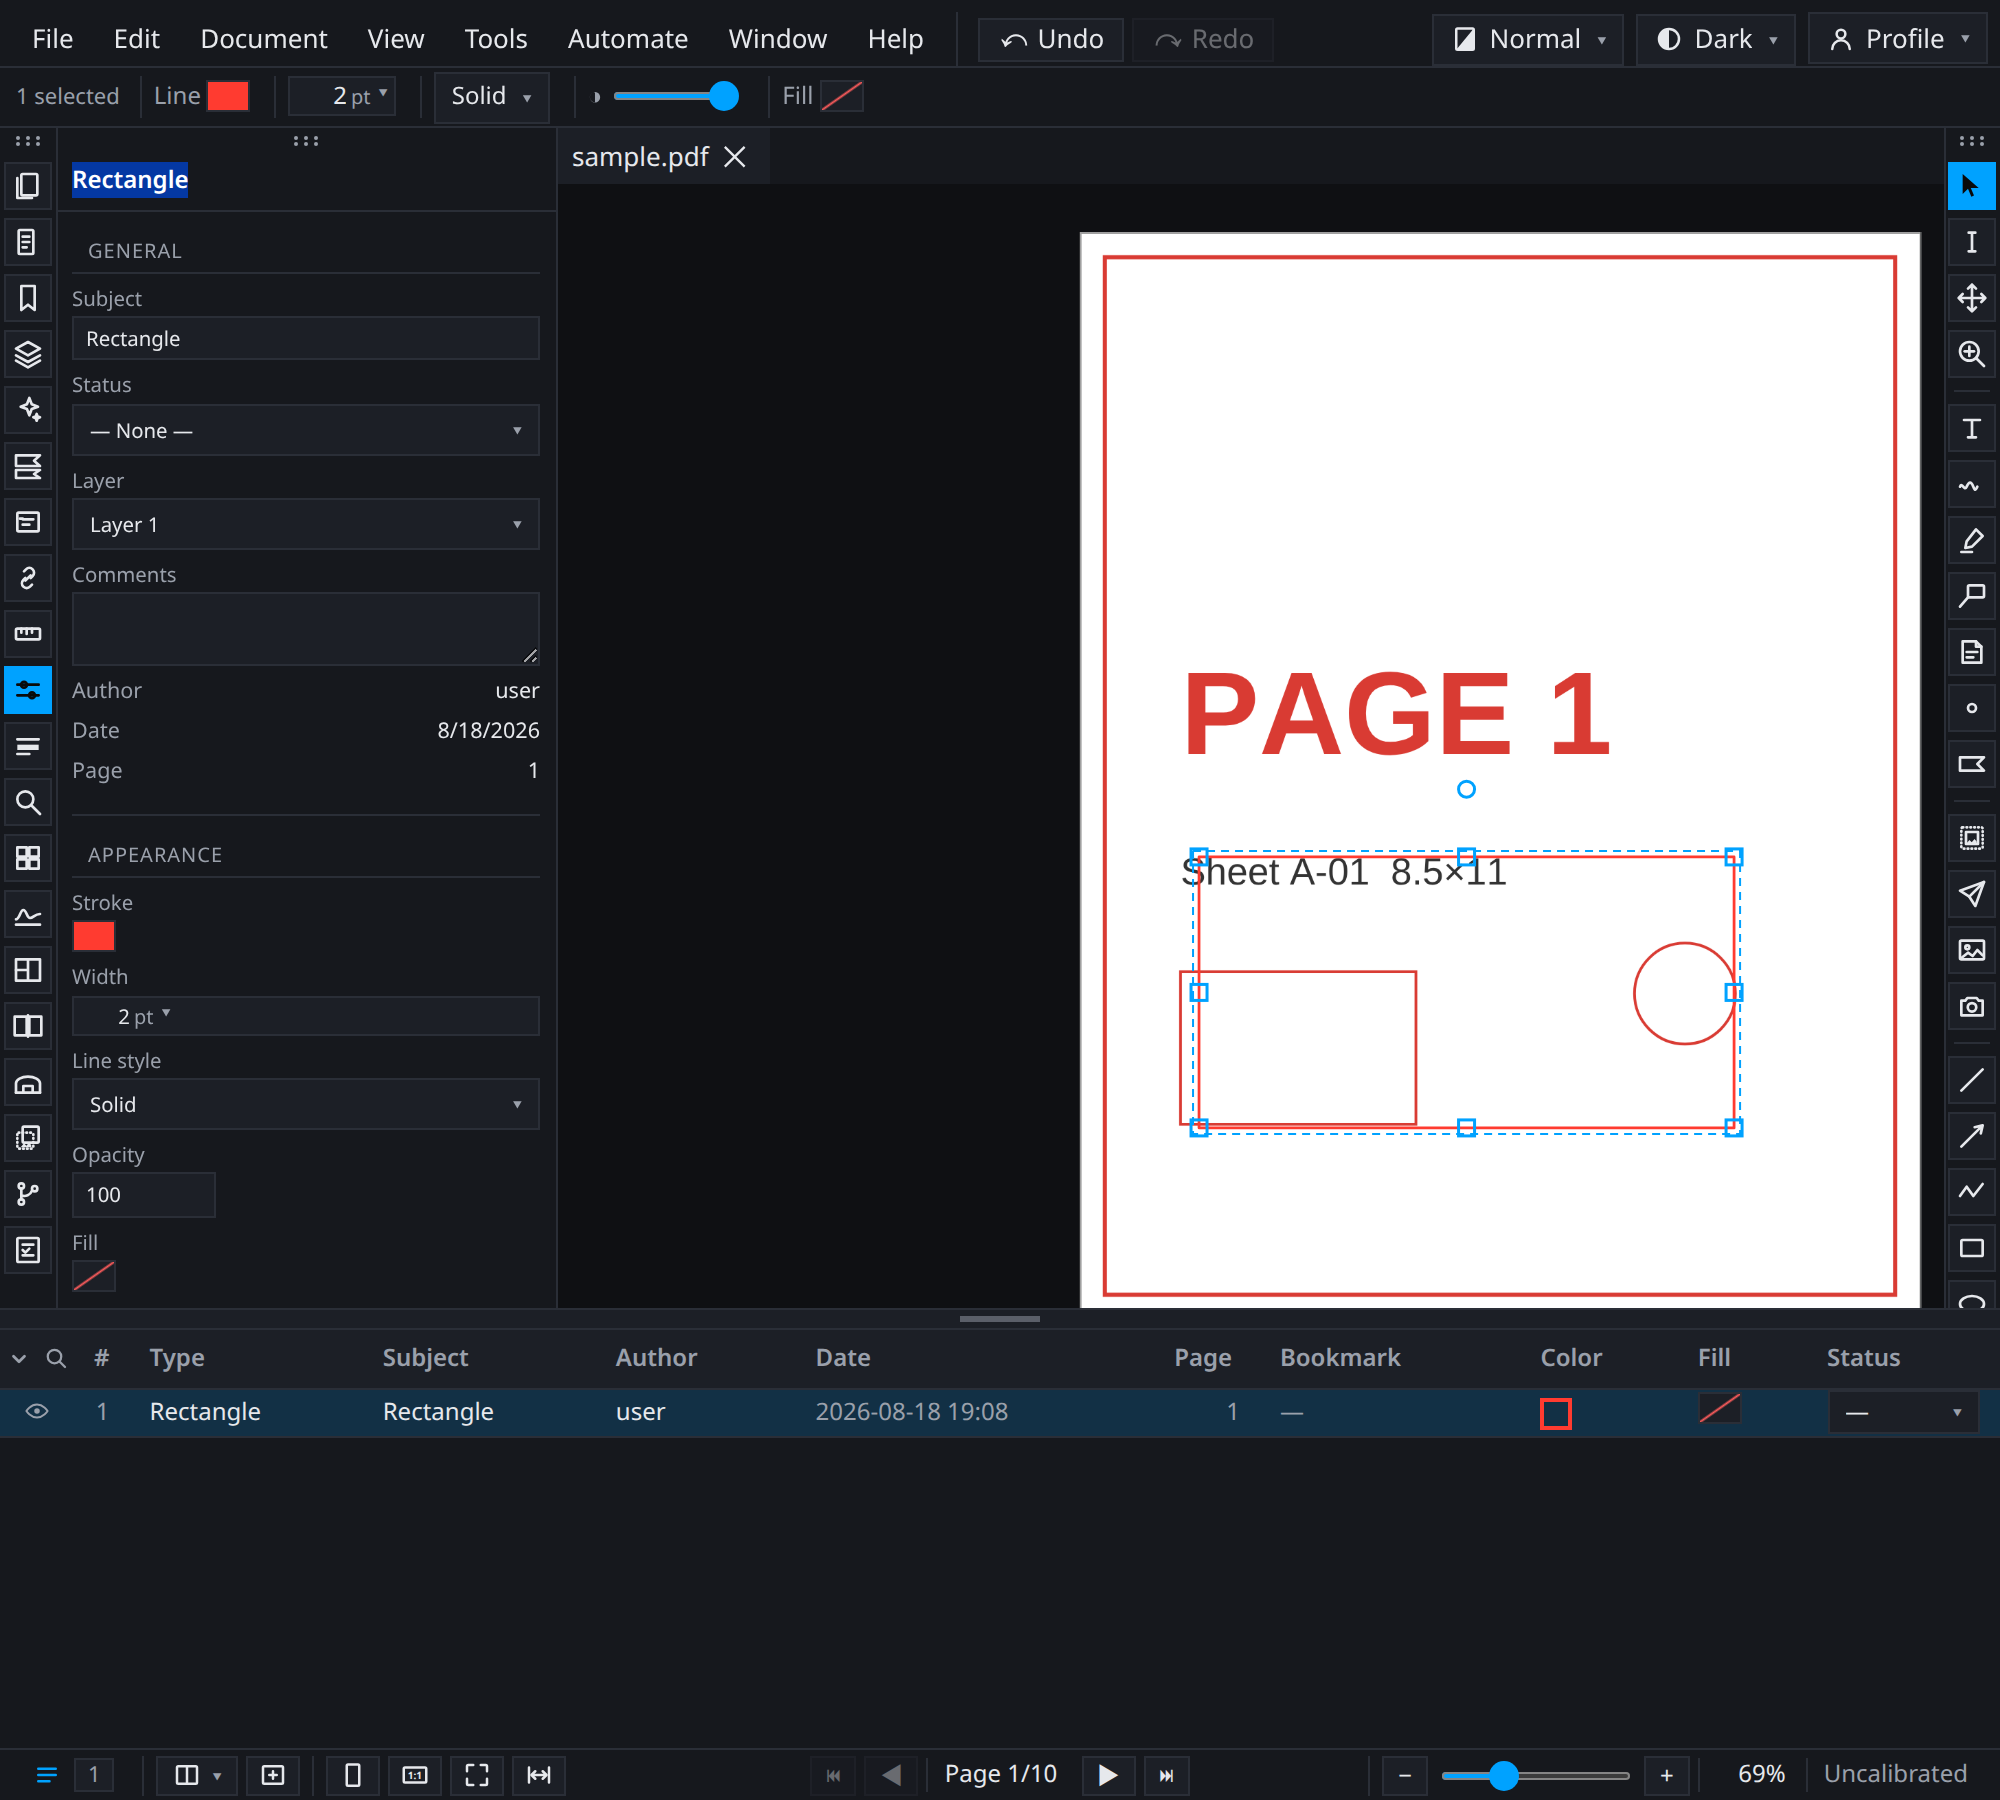
The moment it exists it is a row in the Markups List — with its type, subject, author, date, page, colour and status. That list is sortable and groupable, and selecting a row selects the markup on the page.
The Properties panel is the same information as an editor rather than a table: subject, status, layer and comments under General, and stroke colour, width, line style, opacity and fill under Appearance. Anything you change there applies to the selection.
Drag it to move it, drag a handle to resize, drag the grip above it to rotate. Ctrl/Cmd+Z undoes any of that.
Getting a quantity#
A measurement is only meaningful once the page has a scale, so calibration comes first. That is not a formality: a takeoff on the wrong scale is wrong everywhere and looks right.
Open the Measurements panel and choose Calibrate, then pick two points whose real separation you know — a printed dimension string, a door width, a scale bar — and type that length. If the PDF declares its own scale, Redline adopts it, including the precision the drawing was authored at.
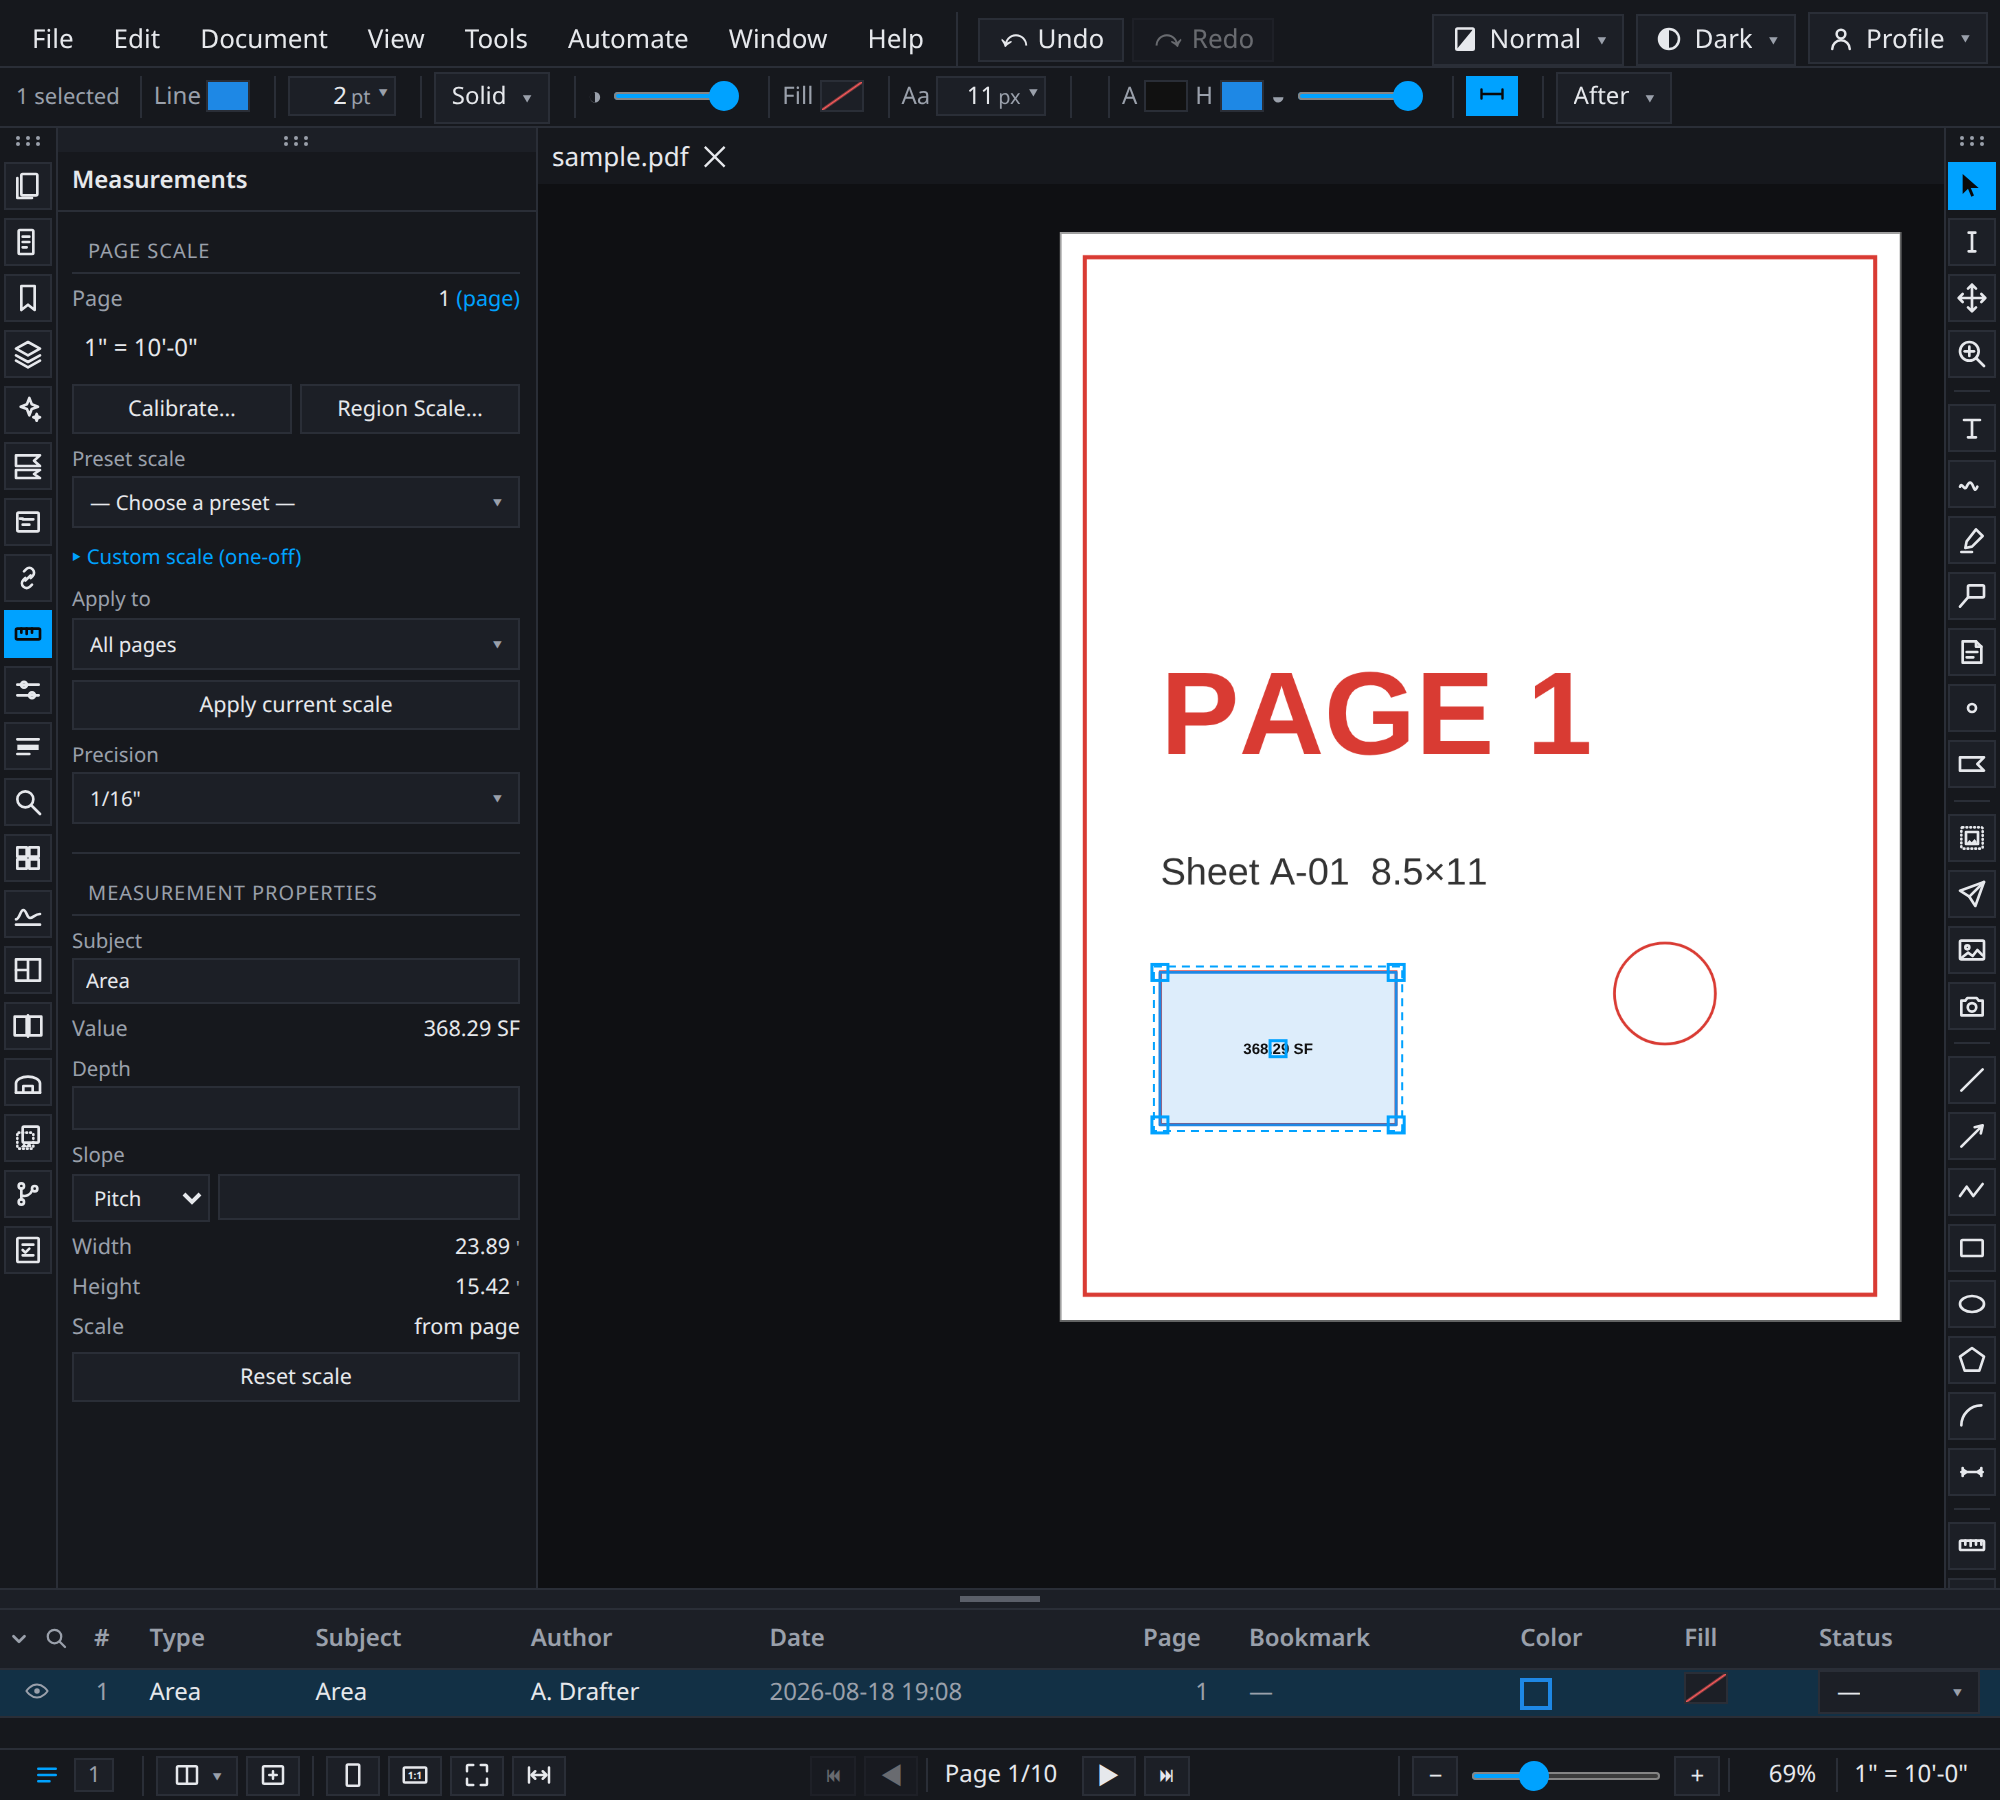
Three things changed in that frame:
- The status bar reads
1" = 10'-0"instead of Uncalibrated, and the Measurements panel names the same scale as a page scale. - The measurement carries its own label, and that label recomputes live. Drag a vertex and the number changes with it; change the page scale and every measurement that inherited it follows.
- Measurement Properties reports the value, the width and height in real units, and — importantly — where the scale came from: from page. A measurement always tells you which calibration it resolved against.
Scale resolves in three tiers — region → page → set — which is what lets one sheet carry a plan at 1/8" and a detail at 1 1/2" without lying about either.
The five things to try next#
- Measure a length.
Shift+L, then click along a wall.Shift+Afor area,Shift+Pfor perimeter,Shift+Cto count. - Add depth. Type a depth into a measurement's row in the Markups List and Volume follows for an area, Wall Area for a perimeter. That is what turns an area into a quantity.
- Group the list. Group the Markups List by Subject to get quantities per assembly, or by Space to get them per room.
- Save your tool. Style a markup the way you like it, then add it to My Tools in the Takeoff Hanger — applying that entry re-arms the tool with that style.
- Send it out. File ▸ Export writes real PDF annotations with appearance streams, so a reviewer in another PDF tool gets objects they can select and edit — not a flattened picture.
Where to go from here#
- Keyboard reference — the full shortcut map.
- Measurement & takeoff — calibration, units, the tools, and the takeoff columns.
- Markup tools — every tool and what it draws.
- The interface — the reference version of this page: every panel and what it is for.